The Perfect Shaggy Choppy Bob for Every Face Shape
We'll show you how to create the perfect shaggy choppy bob hairstyle that will flatter every face shape.
391 Eden Drive, Richmond, VA 23227
804-884-8472
The Perfect Shaggy Choppy Bob for Every Face Shape

There are so many different ways to style your hair, and it can be tricky to find the perfect look for your face shape. But don’t worry, we’ve got you covered! We’ll show you how to create the perfect shaggy choppy bob hairstyle that will flatter every face shape. So, whether you have a round or oval face or you’re looking for a style that will add volume to thin hair, this tutorial is for you! Read on to learn more.
When it comes to a shaggy bob, I think this cut is the most universally flattering. It’s so versatile and can be worn straight or curly. But the key to making this look great on everyone has a little length in the front to frame your face and draw attention toward those beautiful eyes! And don’t forget that you want textured layers throughout, too, because they will give volume at every angle no matter how fine/thick your hair may be:)
This style works best when styled with some waves, which could either mean curling (I like using my curling irons), blow-drying away from the face while adding some bend with fingers then shake loose for soft waves or even an old school method like braiding your hair and sleeping on it overnight for big waves. No matter what option you choose, it’s all about having fun with this cut! I think everyone should try this style at least once in their life:)

A choppy bob is a great style option if you’re looking for something that’s both stylish and low-maintenance. While it may seem tricky to do at home, it’s quite simple once you know the right steps. We’ll walk you through how to create a choppy bob at home. So, whether you’re a beginner or an experienced stylist, follow these steps and get ready to rock your new look!
I’m going to be showing you how I cut my hair into a choppy bob at home. This is one of the first haircut tutorials I put on YouTube, and it was trendy. The video has over two million views now and counting!
The technique is pretty simple, but some things will help you get better results:
A good pair of scissors with sharp blades – don’t use kitchen scissors or cheap ones from the dollar store for this project; they won’t last long before needing to be replaced again (and will probably give you uneven cuts). A tail comb–this tool makes sectioning easier when cutting your hair because it lets me hold back sections without using fingers which usually slip around or get tangled up in strands while trying to section them off.
You can also use a rat tail comb if you don’t have access to one of these; they work just fine as well but might take some getting used to since they aren’t quite so precise when holding back smaller sections like what we want here (more on that later). Finally, a hand mirror is optional, but I think it helps immensely because then I know exactly where my hairline starts and ends without having to pull all the way down from behind me every time!

We'll show you how to create the perfect shaggy choppy bob hairstyle that will flatter every face shape.

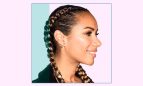
Braids are a popular hairstyle for women, and there are many different ways to style them. However, one problem can occur when the ends of the braids come loose and start to unravel. There are a few tricks you can use to help keep them closed, so your hairstyle stays in place all day or…
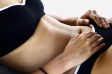
No one ever said getting a bikini wax was easy, but it’s worth it. If you’re new to the process, here are a few steps to help make things a little less daunting. First, make sure you schedule your appointment at least two weeks before your trip to the beach. This will give your skin…

As a woman, it is important to know why you should remove your makeup before going to bed. If you don’t, you could end up with many problems, including acne, skin irritation, and eye infections. Are you guilty of going to bed with your makeup on? You’re not alone. A recent study found that more…

Women are often under the impression that desserts are bad for their skin. However, many dessert recipes can help your skin by providing essential nutrients and antioxidants. They also contain an abundance of water which improves hydration levels in the body. This post will explore some sweet desserts that promote healthy skin while tasting great!…
 Julia Dryden and her team are dedicated to enhance the beauty of their clients by accentuating natural features artistically, and by providing the highest quality makeovers and creative, trendy hairstyles.
Under Julia’s creative and artistic direction his team of Internationally recognized hairstylists produce stylish, modern and high-end results.
![]()